Friday 28 September 2012

Positioning a Point

Elements of Design: Positioning a Point

To illustrate this the following images have been created with a single point as a focal point.


Design: Point of Interest
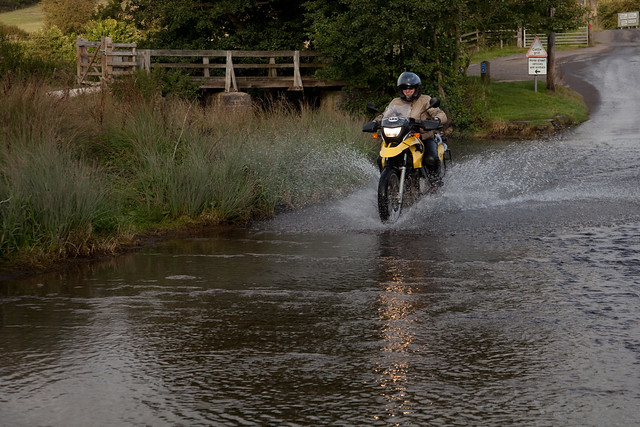
In this image the position chosen was to get the bike and rider into the top horizontal third slightly off centre with the reflected light leading the eye up the image. Also after an attempt at using blur to empahsie the water flow it was found that using a faster speed gave a sharper image and the increased feeling of motion by clearly showing the bow wave and hence the mechanical speed of the vehicle against the organic flow of the water.


Design: Point of Interest
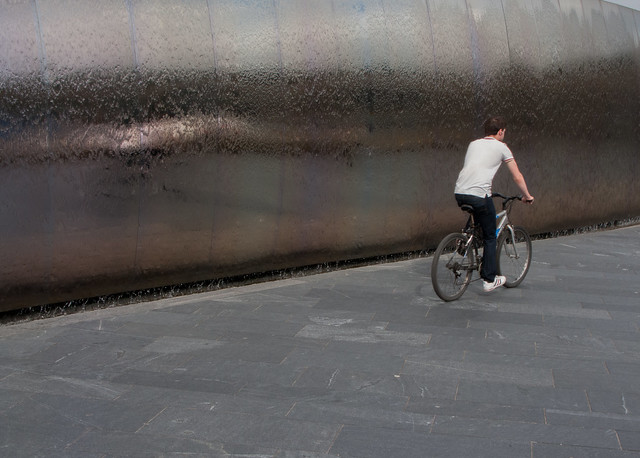
 This subject again uses a fast shutter speed but in this case to keep the background clear. I wanted to emphasise the contrast between the colour of the shirt and the "softness" of the person on the bike against the "hardness" of the steel water wall and slate paving floor. Also by placing the subject in the right hand vertical third it gives another  take on motion within an image.

Design: Point of Interest

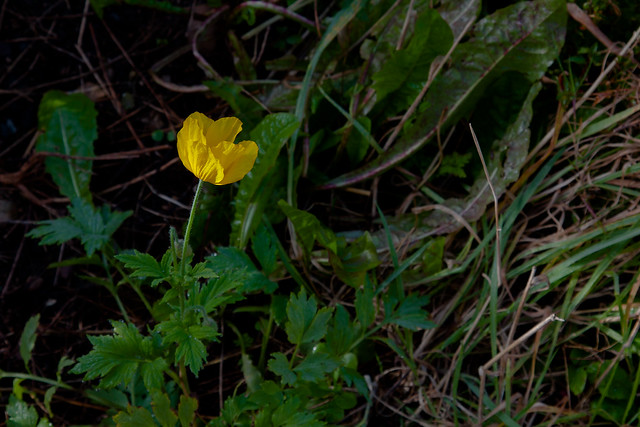
This image utilise the use of colour and texture to isolate the yellow poppy against the green of the other foliage. I used the first vertical third division to isolate and emphasise this against the green. I feel that by doing this you become aware of the subject then aware of the surroundings.

Thursday 27 September 2012

Points

Elements of Design: Points

To appreciate this element of design we need to examine the potential for a "focal point" or central point" of interest within an image.

The reason a focal point is important is that when you look at an image your eye will generally need a ‘resting place’ or something of interest to really hold it.

A focal point can be virtually anything ranging from a person, to a building, to a mountain, to a flower etc. Obviously the more interesting the focal point the better – but there are other things you can consider when using this including:

  • Position – Place it in a prominent position –  This ideally using the "rule of thirds" or the "golden section" to establish the correct position.
  • Focus – Using "Depth of Field" to blur out other aspects in front or behind your focal point.
  • Blur/Motion – Isolate the subject using shutter speed to blur the surroundings/background or alternatively capture the motion.
  • Size – making your focal point large is not the only way to make it prominent – but it can help if it remains within context.
  • Colour – using contrasting colours to isolate or seperate your point of interest apart from it’s surroundings.
  • Shape – contrasting shapes and textures can make a subject stand out – especially patterns that are repeated around a subject.
  • Context -  or using the unusual. This can be accomplished by placing the subject in an unexpected setting or against a background that contrasts with the subject context.